
Colour pinstripe/Display: Difference between revisions
m Phix/pGUI |
|||
Line 858:
=={{header|Phix}}==
{{libheader|
<lang Phix>-- demo\rosetta\Colour_pinstripe.exw
include pGUI.e
| |||
Revision as of 16:04, 25 May 2020

You are encouraged to solve this task according to the task description, using any language you may know.
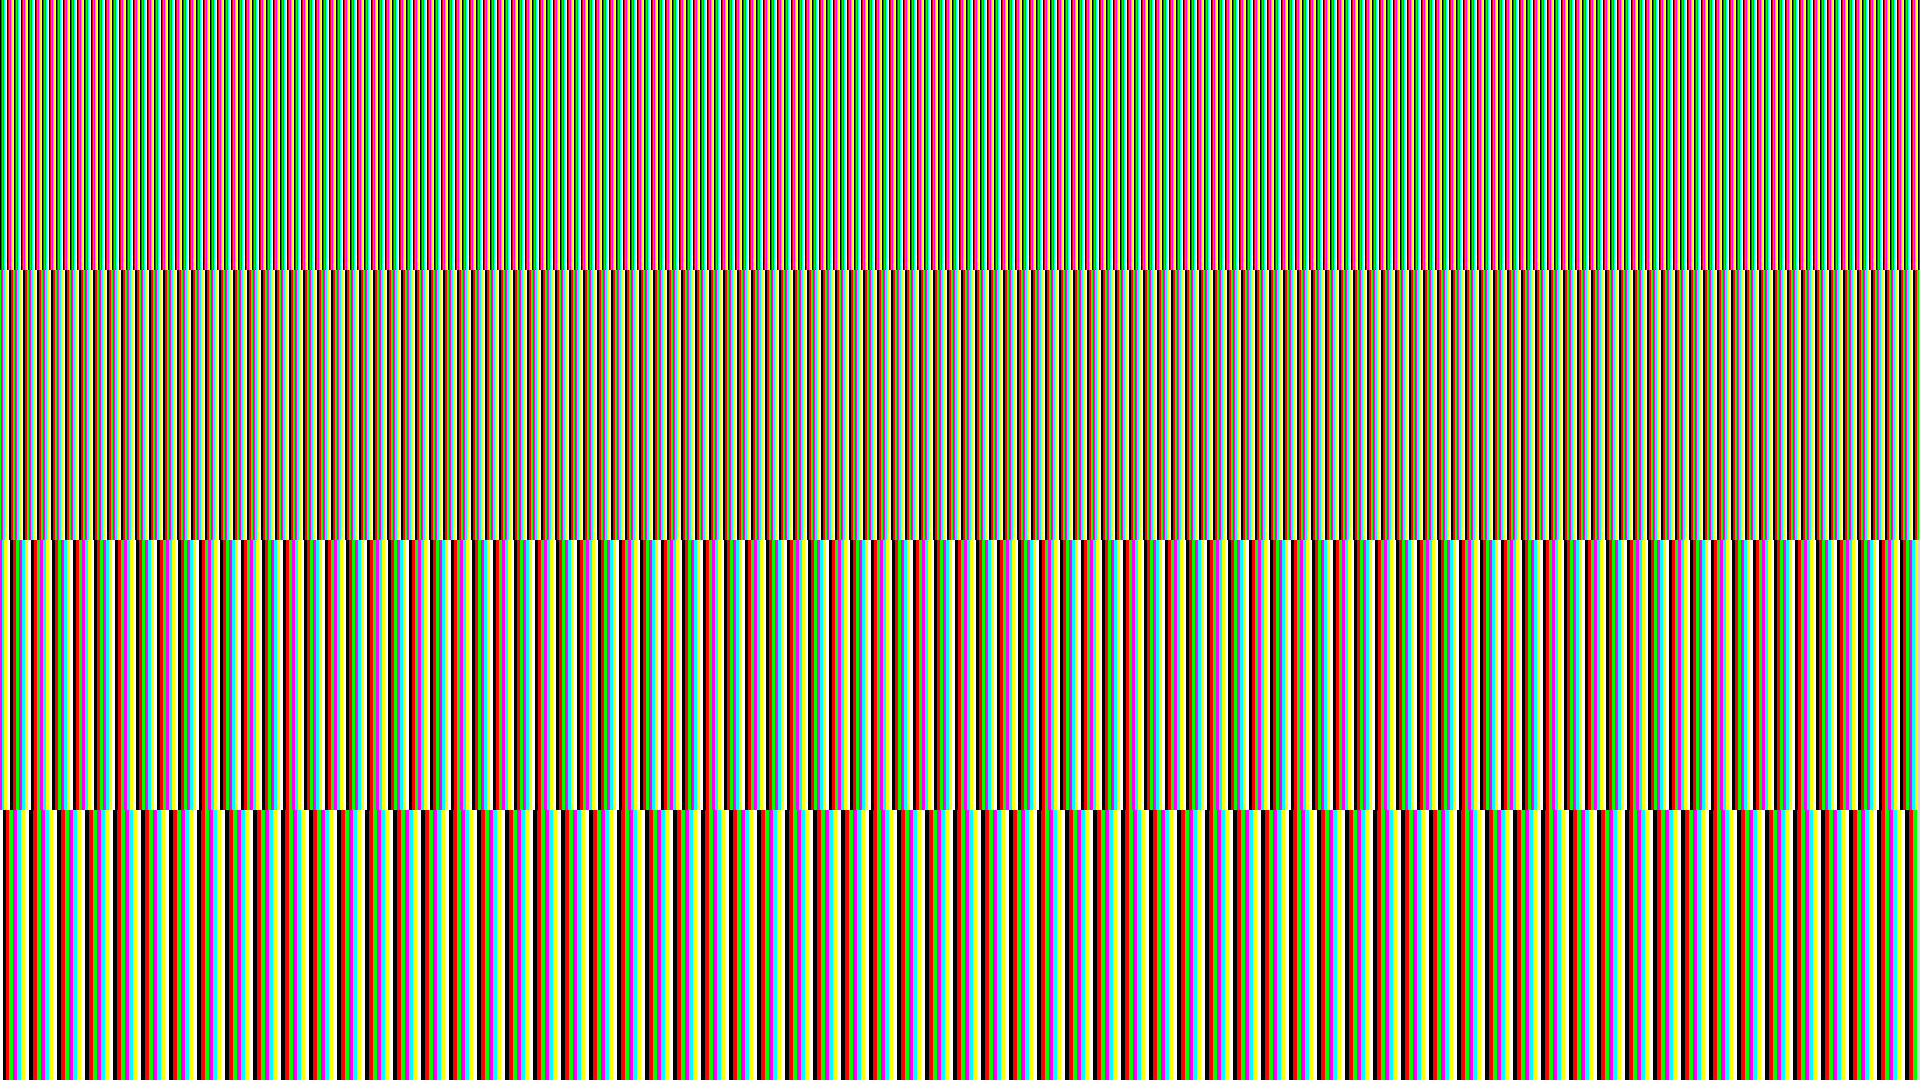
The task is to create 1 pixel wide coloured vertical pinstripes with a sufficient number of pinstripes to span the entire width of the graphics display. The pinstripes should either follow the system palette sequence or a sequence that includes Black, Red, Green, Blue, Magenta, Cyan, Yellow, White.
After filling the top quarter of the display, we switch to a wider 2 pixel wide vertical pinstripe pattern. Halfway down the display we switch to 3 pixel wide vertical pinstripe and then finally to a 4 pixels wide vertical pinstripe for the last quarter of the display.
cf.
ActionScript
<lang ActionScript3> package {
   import flash.display.Bitmap;
   import flash.display.BitmapData;
   import flash.display.Sprite;
   import flash.events.Event;

   public class ColourPinstripe extends Sprite {

       public function ColourPinstripe():void {
           if (stage) init();
           else addEventListener(Event.ADDED_TO_STAGE, init);
       }

       private function init(e:Event = null):void {

           var colours:Array = [ 0xFF000000, 0xFFFF0000, 0xFF00FF00, 0xFF0000FF, 0xFFFF00FF, 0xFF00FFFF, 0xFFFFFF00, 0xFFFFFFFF ];
           var data:BitmapData = new BitmapData(stage.stageWidth, stage.stageHeight, false, 0xFFFFFFFF);
           data.lock();

           var w:uint = data.width, h:uint = data.height / 4;
           var x:uint, y:uint = 0, i:uint, px:uint, colourIndex:uint, colour:uint, maxy:uint = h;

           for ( i = 1; i <= 4; i++ ) {

               for ( ; y < maxy; y++ ) {
                   colour = 0xFF000000;
                   colourIndex = 0;
                   px = 1;

                   for ( x = 0; x < w; x++ ) {

                       if ( px == i ) {
                           colourIndex = (colourIndex > 7) ? 0 : colourIndex + 1;
                           colour = colours[colourIndex];
                           px = 1;
                       }
                       else px++;

                       data.setPixel32(x, y, colour);

                   }
               }

               maxy += h;

           }

           data.unlock();
           addChild(new Bitmap(data));
       }

   }
} </lang>
Ada
<lang Ada>with SDL.Video.Windows.Makers; with SDL.Video.Renderers.Makers; with SDL.Video.Palettes; with SDL.Events.Events;
procedure Colour_Pinstripe_Display is
  Width   : constant := 1_200;
  Height  : constant := 800;
  Window   : SDL.Video.Windows.Window;
  Renderer : SDL.Video.Renderers.Renderer;
  Event    : SDL.Events.Events.Events;
  procedure Draw_Pinstripe (Line_Width   : in Integer;
                            Line_Height  : in Integer;
                            Screen_Width : in Integer;
                            Y            : in Integer)
  is
     type Colour_Range is (Black, Red, Green, Blue, Magenta, Cyan, Yellow, White);
     Colours : constant array (Colour_Range) of SDL.Video.Palettes.Colour
       := (Black   => (0, 0, 0, 255),     Red   => (255, 0, 0, 255),
           Green   => (0, 255, 0, 255),   Blue  => (0, 0, 255, 255),
           Magenta => (255, 0, 255, 255), Cyan  => (0, 255, 255, 255),
           Yellow  => (255, 255, 0, 255), White => (255, 255, 255, 255));
     Col   : Colour_Range := Colour_Range'First;
     Count : constant Integer := Screen_Width / Line_Width;
  begin
     for A in 0 .. Count loop
        Renderer.Set_Draw_Colour (Colour => Colours (Col));
        Renderer.Fill (Rectangle => (X => SDL.C.int (A * Line_Width), Y => SDL.C.int (Y),
                                     Width  => SDL.C.int (Line_Width),
                                     Height => SDL.C.int (Line_Height)));
        Col := (if Col = Colour_Range'Last
                  then Colour_Range'First
                  else Colour_Range'Succ (Col));
     end loop;
  end Draw_Pinstripe;
  procedure Wait is
     use type SDL.Events.Event_Types;
  begin
     loop
        while SDL.Events.Events.Poll (Event) loop
           if Event.Common.Event_Type = SDL.Events.Quit then
              return;
           end if;
        end loop;
        delay 0.100;
     end loop;
  end Wait;
begin
  if not SDL.Initialise (Flags => SDL.Enable_Screen) then
     return;
  end if;
  SDL.Video.Windows.Makers.Create (Win      => Window,
                                   Title    => "Pinstripe",
                                   Position => SDL.Natural_Coordinates'(X => 10, Y => 10),
                                   Size     => SDL.Positive_Sizes'(Width, Height),
                                   Flags    => 0);
  SDL.Video.Renderers.Makers.Create (Renderer, Window.Get_Surface);
  Draw_Pinstripe (1, Height / 4, Width, 0);
  Draw_Pinstripe (2, Height / 4, Width, 200);
  Draw_Pinstripe (3, Height / 4, Width, 400);
  Draw_Pinstripe (4, Height / 4, Width, 600);
  Window.Update_Surface;
  Wait;
  Window.Finalize;
  SDL.Finalise;
end Colour_Pinstripe_Display;</lang>
AutoHotkey

Requires the GDI+ standard library: http://www.autohotkey.com/forum/viewtopic.php?t=32238
It is worth noting that this fills the whole screen; press Esc to exit.
<lang AHK>h := A_ScreenHeight
w := A_ScreenWidth
pToken := gdip_Startup()
hdc := CreateCompatibleDC()
hbm := CreateDIBSection(w, h)
obm := SelectObject(hdc, hbm)
G := Gdip_GraphicsFromHDC(hdc)
OnExit, Exit
Gui -Caption +E0x80000 +LastFound +OwnDialogs +Owner +AlwaysOnTop Gui Show, NA hwnd := WinExist()
colors := [0xFF000000, 0xFFFF0000, 0xFF00FF00, 0xFF0000FF , 0xFFFF00FF, 0xFF00FFFF, 0xFFFFFF00, 0xFFFFFFFF] ; ARGB pBrush := [] Loop % colors.MaxIndex() pBrush[A_Index] := Gdip_BrushCreateSolid(colors[A_Index]) Loop 4 { n := A_Index Loop % w Gdip_FillRectangle(G, pBrush[Mod(A_Index-1, colors.MaxIndex())+1] , A_Index*n-n, (n-1)*h/4, n, h/4) }
UpdateLayeredWindow(hwnd, hdc, 0, 0, W, H)
Loop % colors.MaxIndex() Gdip_DeleteBrush(pBrush[A_Index])
SelectObject(hdc, obm) DeleteObject(hbm) DeleteDC(hdc) Gdip_DeleteGraphics(G) Return
Esc:: Exit: Gdip_Shutdown(pToken) ExitApp</lang>
BBC BASIC
<lang bbcbasic> SW_MAXIMIZE = 3
     SYS "ShowWindow", @hwnd%, SW_MAXIMIZE
     VDU 26

     W% = @vdu%!208 * 2
     H% = @vdu%!212 / 2

     COLOUR 1,9
     COLOUR 2,10
     COLOUR 3,12
     COLOUR 4,13
     COLOUR 5,14
     COLOUR 6,11
     COLOUR 7,15

     Y% = H%*4
     FOR P% = 1 TO 4
       Y% -= H%
       FOR X% = 0 TO W% STEP 4*P%
         C% = (C% + 1) MOD 8
         GCOL C%
         RECTANGLE FILL X%, Y%, 2*P%, H%
       NEXT
     NEXT P%
</lang>
Befunge
Writes the image to stdout using the PPM format. You can either redirect that to a file, or pipe it to something like ImageMagick's display utility to view the result.
The dimensions of the image are specified by the first two values on the stack: 1366 ("%":*3-) by 768 ("`"8*).
<lang befunge>"%":*3-"`"8*>4/::8%00p8/10p4*\55+"3P",,,:.\.5v 5+:,1vv\%2:%8/-g025:\-1_$$55+,\:v1+*8g01g00_@> 024,.<>2/:2%\2/...1+\:>^<:\0:\-1_$20g1-:20p^1p</lang>
C
The following code uses the BGI graphics library of Borland's Turbo C.
<lang C>
- include<graphics.h>
- include<conio.h>
- define sections 4
int main() { int d=DETECT,m,maxX,maxY,x,y,colour=0,increment=1; initgraph(&d,&m,"c:/turboc3/bgi");
maxX = getmaxx(); maxY = getmaxy();
for(y=0;y<maxY;y+=maxY/sections) { for(x=0;x<maxX;x+=increment) { setfillstyle(SOLID_FILL,(colour++)%16); bar(x,y,x+increment,y+maxY/sections); } increment++; colour = 0; }
getch(); closegraph(); return 0; } </lang>
C++
 <lang cpp>
- include <windows.h>
//-------------------------------------------------------------------------------------------------- class pinstripe { public:
   pinstripe()                        { createColors(); }
   void setDimensions( int x, int y ) { _mw = x; _mh = y; }
   void createColors()
   {
colors[0] = 0; colors[1] = 255; colors[2] = RGB( 0, 255, 0 ); colors[3] = RGB( 0, 0, 255 ); colors[4] = RGB( 255, 0, 255 ); colors[5] = RGB( 0, 255, 255 ); colors[6] = RGB( 255, 255, 0 ); colors[7] = RGB( 255, 255, 255 );
}
   void draw( HDC dc )
   {
       HPEN pen;
int lh = _mh / 4, row, cp; for( int lw = 1; lw < 5; lw++ ) { cp = 0;
row = ( lw - 1 ) * lh;
for( int x = 0 + lw > 1 ? lw > 3 ? 2 : 1 : 0; x < _mw; x += lw ) { pen = CreatePen( PS_SOLID, lw, colors[cp] ); ++cp %= 8;
SelectObject( dc, pen ); MoveToEx( dc, x, row, NULL ); LineTo( dc, x, row + lh ); DeleteObject( pen ); } }
}
private:
   int _mw, _mh;
   DWORD colors[8];
}; //-------------------------------------------------------------------------------------------------- pinstripe pin;
//-------------------------------------------------------------------------------------------------- void PaintWnd( HWND hWnd ) {
   PAINTSTRUCT ps;
   HDC hdc = BeginPaint( hWnd, &ps );
   pin.draw( hdc );
   EndPaint( hWnd, &ps );
} //-------------------------------------------------------------------------------------------------- LRESULT CALLBACK WndProc( HWND hWnd, UINT msg, WPARAM wParam, LPARAM lParam ) {
   switch( msg )
   {
case WM_DESTROY: PostQuitMessage( 0 ); break; case WM_PAINT: PaintWnd( hWnd ); break; default: return DefWindowProc( hWnd, msg, wParam, lParam );
   }
   return 0;
} //-------------------------------------------------------------------------------------------------- HWND InitAll( HINSTANCE hInstance ) {
   WNDCLASSEX wcex;
   ZeroMemory( &wcex, sizeof( wcex ) );
   wcex.cbSize	       = sizeof( WNDCLASSEX );
   wcex.style	       = CS_HREDRAW | CS_VREDRAW;
   wcex.lpfnWndProc   = WndProc;
   wcex.hInstance     = hInstance;
   wcex.hCursor       = LoadCursor( NULL, IDC_ARROW );
   wcex.hbrBackground = ( HBRUSH )( COLOR_WINDOW + 1 );
   wcex.lpszClassName = "_CLR_PS_";
   RegisterClassEx( &wcex );
   return CreateWindow( "_CLR_PS_", ".: Clr Pinstripe -- PJorente :.", WS_POPUP, CW_USEDEFAULT, 0, 200, 200, NULL, NULL, hInstance, NULL );
} //-------------------------------------------------------------------------------------------------- int APIENTRY _tWinMain( HINSTANCE hInstance, HINSTANCE hPrevInstance, LPTSTR lpCmdLine, int nCmdShow ) {
srand( GetTickCount() );
   HWND hwnd = InitAll( hInstance );
   if( !hwnd ) return -1;
int mw = GetSystemMetrics( SM_CXSCREEN ),
mh = GetSystemMetrics( SM_CYSCREEN );
pin.setDimensions( mw, mh );
RECT rc = { 0, 0, mw, mh };
   AdjustWindowRectEx( &rc, WS_POPUP, FALSE, 0 );
   int w = rc.right  - rc.left,
h = rc.bottom - rc.top;
int posX = ( GetSystemMetrics( SM_CXSCREEN ) >> 1 ) - ( w >> 1 ),
posY = ( GetSystemMetrics( SM_CYSCREEN ) >> 1 ) - ( h >> 1 );
   SetWindowPos( hwnd, HWND_TOP, posX, posY, w, h, SWP_NOZORDER );
   ShowWindow( hwnd, nCmdShow );
   UpdateWindow( hwnd );
   MSG msg;
   ZeroMemory( &msg, sizeof( msg ) );
   while( msg.message != WM_QUIT )
   {
if( PeekMessage( &msg, NULL, 0, 0, PM_REMOVE ) != 0 ) { TranslateMessage( &msg ); DispatchMessage( &msg ); }
   }
   return UnregisterClass( "_CLR_PS_", hInstance );
} //-------------------------------------------------------------------------------------------------- </lang>
Common Lisp
Using Allegro's Common Graphics. As stated in the comments, I'm using line drawing here which causes the line caps to make the edges between regions to be a bit ragged. I mention a couple of alternatives there which I'm too lazy to implement right now. <lang lisp>(in-package :cg-user)
- We only need a bitmap pane - nothing fancy
(defclass draw-pane (bitmap-pane)())
- close it down by clicking on it
(defmethod mouse-left-down ((pane draw-pane) buttons data)
 (declare (ignore buttons data))
 (close pane))
- Create the window and draw the pinstripes
(defun make-draw-window ()
 (let ((win (make-window :one :class 'draw-pane :width 300 :height 200)))
   (draw win)))
- Function to draw the pinstripes. The lines are a bit ragged at the intersections
- between pinstripe sections due to the fact that common graphics uses round line
- caps and there doesn't appear any way to change that. Could be fixed by using
- rectangles rather than lines or, perhaps, by setting rectangular clipping regions.
(defun draw (win)
 (do ((lwidth 1 (+ 1 lwidth))
      (top 0 bottom)
      (colors (make-array 8 :initial-contents
                          '(black red green blue magenta cyan yellow white)))
      (bottom (/ (height win) 4) (+ (/ (height win) 4) bottom)))
     ((eql 5 lwidth) t)
   (with-line-width (win lwidth)
     (do ((xpos 0 (+ xpos lwidth))
          (clr-ndx 0 (mod (+ clr-ndx 1) 8)))
          ((> xpos (width win)) t)
       (with-foreground-color (win (aref colors clr-ndx))
         (draw-line win
                    (make-position xpos top)
                    (make-position xpos bottom)))))))</lang>
FreeBASIC
<lang freebasic>' version 14-03-2017 ' compile with: fbc -s console ' or compile with: fbc -s gui
Dim As UInteger ps, col, h, w, x, y1, y2 ScreenInfo w, h
' create display size window, 8bit color (palette), no frame ScreenRes w, h, 8,, 8
h = h \ 4 : y2 = h -1
For ps = 1 To 4
   col = 0
   For x = 0 To (w - ps -1) Step ps
       Line (x, y1) - (x + ps -1, y2), col, bf
       col = (col +1) And 255
   Next
   y1 += h : y2 += h
Next
' empty keyboard buffer While Inkey <> "" : Wend 'Print : Print "hit any key to end program" Sleep End</lang>
Gambas
<lang gambas>'WARNING this takes a time to display
Public Sub Form_Open() Dim iColour As Integer[] = [Color.Black, Color.red, Color.Green, Color.Magenta, Color.Cyan, Color.Yellow, Color.white] Dim hPanel As Panel Dim siCount, siCounter, siSet As Short
With Me
 .Arrangement = Arrange.Row
 .Border = False
 .Height = 1080
 .Width = 400
 .Fullscreen = True
End With
For siCounter = 1 To 4
 For siCount = 0 To Desktop.Width Step siCounter
   hpanel = New Panel(Me)
   hpanel.Width = siCounter
   hpanel.Height = Desktop.Height / 4
   HPanel.Background = iColour[siSet]
   Inc siSet
   If siSet > 6 Then siSet = 0
 Next
Next
End </lang> Click to see output image
Go
<lang go>package main
import "github.com/fogleman/gg"
var palette = [8]string{
   "000000", // black
   "FF0000", // red
   "00FF00", // green
   "0000FF", // blue
   "FF00FF", // magenta
   "00FFFF", // cyan
   "FFFF00", // yellow
   "FFFFFF", // white
}
func pinstripe(dc *gg.Context) {
   w := dc.Width()
   h := dc.Height() / 4
   for b := 1; b <= 4; b++ {
       for x, ci := 0, 0; x < w; x, ci = x+b, ci+1 {
           dc.SetHexColor(palette[ci%8])
           y := h * (b - 1)
           dc.DrawRectangle(float64(x), float64(y), float64(b), float64(h))
           dc.Fill()
       }
   }
}
func main() {
   dc := gg.NewContext(900, 600)
   pinstripe(dc)
   dc.SavePNG("color_pinstripe.png")
}</lang>
- Output:
Image similar to AutoHotkey entry.
Icon and Unicon
This is a modified version of the Pinstripe/Display solution. A shrunken screenshot is included.
<lang Icon>link graphics,numbers,printf
procedure main() # pinstripe
  &window := open("Colour Pinstripe","g","bg=black") |
     stop("Unable to open window")
  WAttrib("canvas=hidden")
  WAttrib(sprintf("size=%d,%d",WAttrib("displaywidth"),WAttrib("displayheight")))
  WAttrib("canvas=maximal")

  Colours := ["black", "red", "green", "blue", "magenta", "cyan", "yellow", "white"]
  height := WAttrib("height")
  width  := WAttrib("width")

  maxbands := 4                             # bands to draw
  bandheight := height / maxbands           # height of each band
  every bands := 1 to maxbands do {         # for each band
        top   := 1 + bandheight * (bands-1) # .. top of band
        every c := 1 to width do {
           colour := Colours[ceil((c+0.)/bands)%*Colours+1]
           if colour == "black" then next   # skip black
           else {
              Fg(colour)
              DrawLine(c,top,c,top+bandheight-1)
              }
        }
     }
  WDone()
end</lang>

graphics.icn provides graphics numbers.icn provides ceil printf.icn provides sprintf
J
<lang j> load 'viewmat'
  size=. 2{.".wd'qm' NB. J6
  size=. getscreenwh_jgtk_  NB. J7
  'rgb'viewmat (4<.@%~{:size)# ({.size) $&> 1 2 3 4#&.> <256#.255*#:i.8</lang>
Java
<lang java>import java.awt.*; import static java.awt.Color.*; import javax.swing.*;
public class ColourPinstripeDisplay extends JPanel {
   final static Color[] palette = {black, red, green, blue, magenta,cyan,
       yellow, white};
final int bands = 4;
   public ColourPinstripeDisplay() {
       setPreferredSize(new Dimension(900, 600));
   }
   @Override
   public void paintComponent(Graphics g) {
       super.paintComponent(g);
       int h = getHeight();
       for (int b = 1; b <= bands; b++) {
           for (int x = 0, colIndex = 0; x < getWidth(); x += b, colIndex++) {
               g.setColor(palette[colIndex % palette.length]);
               g.fillRect(x, (b - 1) * (h / bands), x + b, b * (h / bands));
           }
       }
   }
   public static void main(String[] args) {
       SwingUtilities.invokeLater(() -> {
           JFrame f = new JFrame();
           f.setDefaultCloseOperation(JFrame.EXIT_ON_CLOSE);
           f.setTitle("ColourPinstripeDisplay");
           f.add(new ColourPinstripeDisplay(), BorderLayout.CENTER);
           f.pack();
           f.setLocationRelativeTo(null);
           f.setVisible(true);
       });
   }
}</lang>
Julia
<lang julia>using Gtk, Graphics, Colors
function drawline(ctx, p1, p2, color, width)
   move_to(ctx, p1.x, p1.y)
   set_source(ctx, color)
   line_to(ctx, p2.x, p2.y)
   set_line_width(ctx, width)
   stroke(ctx)
end
const can = @GtkCanvas() const win = GtkWindow(can, "Colour pinstripe/Display", 400, 400) const colors = [colorant"black", colorant"red", colorant"green", colorant"blue",
colorant"magenta", colorant"cyan", colorant"yellow", colorant"white"]
const numcolors = length(colors)
@guarded draw(can) do widget
   ctx = getgc(can)
   h = height(can)
   w = width(can)
   deltaw = 1.0
   for (i, x) in enumerate(0:deltaw:w)
       drawline(ctx, Point(x, 0.25*h), Point(x, 0), colors[i % numcolors + 1], deltaw)
   end
   for (i, x) in enumerate(0:deltaw*2:w)
       drawline(ctx, Point(x, 0.5*h), Point(x, 0.25*h), colors[i % numcolors + 1], deltaw*2)
   end
   for (i, x) in enumerate(0:deltaw*3:w)
       drawline(ctx, Point(x, 0.75*h), Point(x, 0.5*h), colors[i % numcolors + 1], deltaw*3)
   end
   for (i, x) in enumerate(0:deltaw*4:w)
       drawline(ctx, Point(x, h), Point(x, 0.75*h), colors[i % numcolors + 1], deltaw*4)
   end
end
show(can)
const cond = Condition()
endit(w) = notify(cond)
signal_connect(endit, win, :destroy)
wait(cond)
</lang>
Kotlin
<lang scala>// version 1.1.0
import java.awt.* import java.awt.Color.* import javax.swing.*
class ColourPinstripeDisplay : JPanel() {
   private companion object {
       val palette = arrayOf(black, red, green, blue, magenta, cyan, yellow, white)
   }
private val bands = 4
   init {
       preferredSize = Dimension(900, 600)
   }
   override fun paintComponent(g: Graphics) {
       super.paintComponent(g)
       for (b in 1..bands) {
           var colIndex = 0
           val h = height / bands
           for (x in 0 until width step b) {
               g.color = palette[colIndex % palette.size]
               g.fillRect(x, (b - 1) * h, b, h)
               colIndex++
           }
       }
   }
}
fun main(args: Array<String>) {
   SwingUtilities.invokeLater {
       val f = JFrame()
       f.defaultCloseOperation = JFrame.EXIT_ON_CLOSE
       f.title = "ColourPinstripeDisplay"
       f.add(ColourPinstripeDisplay(), BorderLayout.CENTER)
       f.pack()
       f.setLocationRelativeTo(null)
       f.isVisible = true
   }
}</lang>
M2000 Interpreter
Module names and variables with same name may exist Above and inside M2000 console layer there are 32 layers. These layers used for text/graphics and as sprites. We can make window forms above console window, any number of them and for forms 100 we can use background as layer too. Behind console layer is the background layer (the console window) and also there we can use it for printing. Also there is one more layer, the printer layer which hold a page. For eedilayers as background, console and sprites we can use Input too. This command can't be used in user windows, we have to use controls and events. Sprite layers have a priority number, so 32 is the top one. We can change priorities sending back any sprite.
Version 2 We change console width and height and put in the center of screen We use a thread to move the layer above console (and inside console form), when we push any mouse button (only in console window). Program ends when we close the modal opened window.
<lang M2000 Interpreter> Module Checkit {
     Window 16, 14000,12000;
     Module Pinstripe {
           Smooth off  ' use of GDI32
           Dim colors(0 to 7)
           Colors(0)=#000000,#FF0000, #00FF00, #0000FF, #FF00FF, #00FFFF, #FFFF00, #FFFFFF
           pixelsX=scale.x/twipsX
           pixelsY=scale.y/twipsY
           zoneheight=scale.y/4
           n=0
           Refresh 5000
           For i=1 to 4 {
                 move 0, (i-1)*zoneheight
                 pinw=i*twipsx
                 For j=1 to pixelsX/i {
                       Fill pinw, zoneheight, color(n)
                       Step  0, -zoneheight
                       n++:if n=8 then n=0
                 }
           }
           \\ now we make the refersh
           Refresh 100
     }
     \\ draw to console window
     \\ now we make a window and draw there
     Pinstripe
     Layer 32 {
           Window 12, 10000,10000
           Pinstripe
           Show
     }
     Declare Pinstripe Form
     Layer Pinstripe {
           Window 12, 10000,10000
           Pinstripe
           motion 2000, 2000
     }
     refresh 20
           Thread {
                if control$="MAIN" then if mouse then player 32,  mousea.x, mousea.y
           } as anyvar interval 100

     Method Pinstripe, "Show", 1
     Threads Erase
     Layer 32 {Hide}
     Cls
} Checkit
</lang>
Maple
<lang Maple> colors := [yellow, black, red, green, magenta, cyan, white]: plots:-display( [
   seq( plot([1+i/10,y,y=5..6], color=colors[i mod 7 + 1],thickness=1), i = 1..500),
   seq( plot([1+i/10,y,y=4..5], color=colors[i mod 7 + 1],thickness=2), i = 1..500),seq( plot([1+i/10,y,y=3..4], color=colors[i mod 7 + 1],thickness=3), i = 1..500),seq( plot([1+i/10,y,y=2..3], color=colors[i mod 7 + 1],thickness=4,size=[interface(screenwidth)*20,interface(screenheight)*32]), i = 1..500)],
axes=none); </lang>
Mathematica / Wolfram Language
<lang Mathematica>color[y_] := {Black, Red, Green, Blue, Magenta, Cyan, Yellow,
White}[[Mod[y, 8] + 1]];
Graphics[Join[{Thickness[1/408]},
 Flatten[{color[#], Line[{{# - 1/2, 408}, {# - 1/2, 307}}]} & /@
   Range[408]], {Thickness[1/204]},
 Flatten[{color[#], Line[[[:Template:2]]]} & /@
   Range[204]], {Thickness[1/136]},
 Flatten[{color[#], Line[[[:Template:3]]]} & /@
   Range[136]], {Thickness[1/102]},
 Flatten[{color[#], Line[[[:Template:4]]]} & /@
   Range[102]]], ImageSize -> {408, 408}]</lang>
- Output:
See here.
OCaml
<lang ocaml>open Graphics
let () =
 open_graph "";
 let width = size_x ()
 and height = size_y () in
 let colors = [| black; red; green; blue; magenta; cyan; yellow; white |] in
 let num_colors = Array.length colors in
 let h = height / 4 in
 for i = 1 to 4 do
   let j = 4 - i in
   for x = 0 to pred width do
     set_color colors.((x / i) mod num_colors);
     moveto x (j * h); lineto x (j * h + h);
   done
 done;
 ignore(read_key())</lang>
run with:
$ ocaml graphics.cma pinstripe.ml
Perl
<lang Perl>#!/usr/bin/perl -w use strict ; use GD ;
my $image = new GD::Image( 320 , 240 ) ; my %colors = ( "white" => [ 255 , 255 , 255 ] , "red" => [255 , 0 , 0 ] ,
     "green" => [ 0 , 255 , 0 ] , "blue" => [ 0 , 0 , 255 ] ,
     "magenta" => [ 255 , 0 , 255 ] , "yellow" => [ 255 , 255 , 0 ] ,
     "cyan" => [ 0 , 255 , 255 ] , "black" => [ 0 , 0 , 0 ] ) ;
my @paintcolors ; foreach my $color ( keys %colors ) {
  my $paintcolor = $image->colorAllocate( @{$colors{ $color }} ) ;
  push @paintcolors, $paintcolor ;
} my $startx = 0 ; my $starty = 0 ; my $run = 0 ; my $barheight = 240 / 4 ; my $colorindex = 0 ; while ( $run < 4 ) {
  my $barwidth =  $run + 1 ;
  while ( $startx + $barwidth < 320 ) {
     $image->filledRectangle( $startx , $starty , $startx + $barwidth ,
$starty + $barheight - 1 , $paintcolors[ $colorindex % 8 ] ) ;
     $startx += $barwidth ;
     $colorindex++ ;
  }
  $starty += $barheight ;
  $startx = 0 ;
  $colorindex = 0 ;
  $run++ ;
}
open ( DISPLAY , ">" , "pinstripes.png" ) || die ; binmode DISPLAY ; print DISPLAY $image->png ; close DISPLAY ;</lang>
Phix
<lang Phix>-- demo\rosetta\Colour_pinstripe.exw include pGUI.e
constant colours = {CD_BLACK, CD_RED, CD_GREEN, CD_MAGENTA, CD_CYAN, CD_YELLOW, CD_WHITE}
procedure draw_to(cdCanvas cdcanvas)
   cdCanvasActivate(cdcanvas)
   integer {width, height} = cdCanvasGetSize(cdcanvas)
   for y=1 to 4 do
       integer x = 0, c = 1, h = floor(height/(5-y))
       while x<width do
           cdCanvasSetForeground(cdcanvas, colours[c])
           cdCanvasBox(cdcanvas, x, x+y, height-h, height)
           x += y
           c = iff(c=length(colours)?1:c+1)
       end while
       height -= h
   end for
   cdCanvasFlush(cdcanvas)
end procedure
Ihandle dlg, canvas cdCanvas cddbuffer, cdcanvas
function redraw_cb(Ihandle /*ih*/, integer /*posx*/, integer /*posy*/)
   draw_to(cddbuffer)
   return IUP_DEFAULT
end function
function map_cb(Ihandle ih)
   cdcanvas = cdCreateCanvas(CD_IUP, ih)
   cddbuffer = cdCreateCanvas(CD_DBUFFER, cdcanvas)
   return IUP_DEFAULT
end function
function unmap_cb(Ihandle /*ih*/)
   cdKillCanvas(cddbuffer)
   cdKillCanvas(cdcanvas)
   return IUP_DEFAULT
end function
function esc_close(Ihandle /*ih*/, atom c)
   if c=K_ESC then return IUP_CLOSE end if
   return IUP_CONTINUE
end function
function print_cb(Ihandle /*ih*/)
   cdCanvan print_canvas = cdCreateCanvas(CD_PRINTER, "pinstripe -d")
   if print_canvas!=NULL then
       draw_to(print_canvas)
       cdKillCanvas(print_canvas)
   end if
   return IUP_DEFAULT
end function
function exit_cb(Ihandle /*ih*/)
return IUP_CLOSE
end function
procedure main()
IupOpen()
   Ihandle file_menu = IupMenu({IupMenuItem("&Print",Icallback("print_cb")),
                                IupMenuItem("E&xit", Icallback("exit_cb"))})
Ihandle main_menu = IupMenu({IupSubmenu("File", file_menu)})
   canvas = IupCanvas(NULL)
   IupSetAttribute(canvas, "RASTERSIZE", "600x400") -- initial size
   IupSetCallback(canvas, "MAP_CB",    Icallback("map_cb"))
   IupSetCallback(canvas, "UNMAP_CB",  Icallback("unmap_cb"))
   dlg = IupDialog(canvas)
   IupSetAttribute(dlg, "TITLE", "Colour pinstripe")
   IupSetAttributeHandle(dlg,"MENU",main_menu)
   IupSetCallback(canvas, "ACTION", Icallback("redraw_cb"))
   IupSetCallback(dlg, "K_ANY",     Icallback("esc_close"))
   IupMap(dlg)
   IupSetAttribute(canvas, "RASTERSIZE", NULL) -- release the minimum limitation
IupShowXY(dlg,IUP_CENTER,IUP_CENTER)
IupMainLoop()
IupClose()
end procedure
main()</lang>
Simply change constant colours to {CD_BLACK, CD_WHITE} for the monochrome tasks (as redirected here).
For the print tasks redirected here, note the routine draw_to() draws 4 bands each one quarter of the page height (with truncation to whole pixels and knock-on-rounding), however cdCanvasGetSize() actually returns {width, height, width_mm, height_mm}, the canvas size in pixels and in millimetres, and from that it is assumed it would be trivial to change the calculation of h from height/4 to 1 inch, and also the "for y=1 to 4 do" to "while height do", all in that one draw_to() routine.
PicoLisp
<lang PicoLisp>(de *Colors # Black Red Green Blue Magenta Cyan Yellow White
  ((0 0 0) (255 0 0) (0 255 0) (0 0 255)
     (255 0 255) (0 255   255) (255 255 0) (255 255 255) .) )
(let Ppm # Create PPM of 384 x 288 pixels
  (make
     (for N 4
        (let L
           (make
              (do (/ 384 N)
                 (let C (pop *Colors)
                    (do N (link C)) ) ) )
           (do 72 (link L)) ) ) )
  (out '(display)  # Pipe to ImageMagick
     (prinl "P6")  # NetPBM format
     (prinl (length (car Ppm)) " " (length Ppm))
     (prinl 255)
     (for Y Ppm (for X Y (apply wr X))) ) )</lang>
PureBasic
<lang PureBasic>;Create a Pinstripe image with a pattern of vertical stripe colors Procedure PinstripeDisplay(width, height, Array psColors(1), numColors = 0)
Protected x, imgID, psHeight = height / 4, psWidth = 1, psTop, horzBand, curColor
 If numColors < 1: numColors = ArraySize(psColors()) + 1: EndIf

 imgID = CreateImage(#PB_Any, width, height)
 If imgID
   StartDrawing(ImageOutput(imgID))
     Repeat
       x = 0
       curColor = 0
       Repeat
         Box(x, psTop, psWidth, psHeight, psColors(curColor))
         curColor = (curColor + 1) % numColors
         x + psWidth
       Until x >= width
       psWidth + 1
       horzBand + 1
       psTop = horzBand * height / 4  ;move to the top of next horizontal band of image
     Until psTop >= height
   StopDrawing()
 EndIf
 ProcedureReturn imgID
EndProcedure
- Open a window and display the pinstripe
If OpenWindow(0, 0, 0, 1, 1,"PureBasic Pinstripe", #PB_Window_Maximize | #PB_Window_SystemMenu)
 Dim psColors(7)
 psColors(0) = RGB($00, $00, $00) ;black
 psColors(1) = RGB($FF, $00, $00) ;red
 psColors(2) = RGB($00, $FF, $00) ;green
 psColors(3) = RGB($00, $00, $FF) ;blue
 psColors(4) = RGB($FF, $00, $FF) ;magenta
 psColors(5) = RGB($00, $FF, $FF) ;cyan
 psColors(6) = RGB($FF, $FF, $00) ;yellow
 psColors(7) = RGB($FF, $FF, $FF) ;white
 PicID = PinstripeDisplay(WindowWidth(0), WindowHeight(0), psColors())
 ImageGadget(0, 0, 0, WindowWidth(0), WindowHeight(0), ImageID(PicID))
 While WaitWindowEvent() <> #PB_Event_CloseWindow
 Wend
EndIf</lang>
Python
<lang Python> from turtle import *
colors = ["black", "red", "green", "blue", "magenta", "cyan", "yellow", "white"]
- Middle of screen is 0,0
screen = getscreen()
left_edge = -screen.window_width()//2
right_edge = screen.window_width()//2
quarter_height = screen.window_height()//4
half_height = quarter_height * 2
speed("fastest")
for quarter in range(4):
   pensize(quarter+1)
   colornum = 0
   min_y = half_height - ((quarter + 1) * quarter_height)
   max_y = half_height - ((quarter) * quarter_height)

   for x in range(left_edge,right_edge,quarter+1):
       penup()
       pencolor(colors[colornum])
       colornum = (colornum + 1) % len(colors)
       setposition(x,min_y)
       pendown()
       setposition(x,max_y)
notused = input("Hit enter to continue: ") </lang>
Racket
<lang Racket>
- lang racket/gui
(define-values [W H] (get-display-size #t))
(define parts 4) (define colors
'("Black" "Red" "Green" "Blue" "Magenta" "Cyan" "Yellow" "White"))
(define (paint-pinstripe canvas dc)
 (send dc set-pen "black" 0 'transparent)
 (send dc set-brush "black" 'solid)
 (define H* (round (/ H parts)))
 (for ([row parts])
   (define Y (* row H*))
   (for ([X (in-range 0 W (add1 row))] [c (in-cycle colors)])
     (send dc set-brush c 'solid)
     (send dc draw-rectangle X Y (add1 row) H*))))
(define full-frame%
 (class frame%
   (define/override (on-subwindow-char r e)
     (when (eq? 'escape (send e get-key-code))
       (send this show #f)))
   (super-new
    [label "Color Pinstripe"] [width W] [height H]
    [style '(no-caption no-resize-border hide-menu-bar no-system-menu)])
   (define c (new canvas% [parent this] [paint-callback paint-pinstripe]))
   (send this show #t)))
(void (new full-frame%)) </lang>
Raku
(formerly Perl 6)
<lang perl6>my ($x,$y) = 1280, 720;
my @colors = map -> $r, $g, $b { [$r, $g, $b] },
    0,   0,   0,
  255,   0,   0,
    0, 255,   0,
    0,   0, 255,
  255,   0, 255,
    0, 255, 255,
  255, 255,   0,
  255, 255, 255;
my $img = open "pinstripes.ppm", :w orelse die "Can't create pinstripes.ppm: $_";
$img.print: qq:to/EOH/;
   P3
   # pinstripes.ppm
   $x $y
   255
   EOH
my $vzones = $y div 4; for 1..4 -> $width {
   my $stripes = ceiling $x / $width / +@colors;
   my $row = [((@colors Xxx $width) xx $stripes).flatmap: *.values].splice(0,$x);
   $img.put: $row for ^$vzones;
}
$img.close;</lang>
Ring
<lang ring>
- Project : Colour pinstripe/Display
load "guilib.ring"
paint = null
new qapp
       {
       win1 = new qwidget() {
                 setwindowtitle("archimedean spiral")
                 setgeometry(100,100,500,600)
                 label1 = new qlabel(win1) {
                             setgeometry(10,10,400,400)
                             settext("")
                 }
                 new qpushbutton(win1) {
                         setgeometry(150,500,100,30)
                         settext("draw")
                         setclickevent("draw()")
                 }
                 show()
       }
       exec()
       }
func draw
       p1 = new qpicture()
              color = new qcolor() {
              setrgb(0,0,255,255)
       }
       pen = new qpen() {
                setcolor(color)
                setwidth(1)
       }
       paint = new qpainter() {
                 begin(p1)
                 setpen(pen)
       w = 100
       h = 100
       color = list(8)
       color[1] = [0 ,0, 0]
       color[2] = [255, 0, 0]
       color[3] = [0, 255, 0]
       color[4] = [0, 0, 255]
       color[5] = [255, 0, 255]
       color[6] = [0, 255, 255]
       color[7] = [255, 255, 0]
       color[8] = [255, 255, 255]
       y = h*4
       for p = 1 to 4
            y = y - h
            for x = 0 to w step 4*p
                 col = random(7) + 1
                 color2 = new qcolor()
                 color2.setrgb(color[col][1],color[col][2],color[col][3],255)
                 mybrush = new qbrush() {setstyle(1) setcolor(color2)}
                 setbrush(mybrush)
                 paint.drawrect(x, y, 2*p, h)
            next
       next
       endpaint()
       }
       label1 { setpicture(p1) show() }
</lang>
See image:
Scala
Java Swing Interoperability
<lang Scala>import java.awt.Color._ import java.awt._
import javax.swing._
object ColourPinstripeDisplay extends App {
private def palette = Seq(black, red, green, blue, magenta, cyan, yellow, white)
 SwingUtilities.invokeLater(() =>
   new JFrame("Colour Pinstripe") {
class ColourPinstripe_Display extends JPanel {
       override def paintComponent(g: Graphics): Unit = {
         val bands = 4
         super.paintComponent(g)
         for (b <- 1 to bands) {
           var colIndex = 0
           for (x <- 0 until getWidth by b) {
             g.setColor(ColourPinstripeDisplay.palette(colIndex % ColourPinstripeDisplay.palette.length))
             g.fillRect(x, (b - 1) * (getHeight / bands), x + b, b * (getHeight / bands))
             colIndex += 1
           }
         }
       }
       setPreferredSize(new Dimension(900, 600))
     }
     add(new ColourPinstripe_Display, BorderLayout.CENTER)
     pack()
     setDefaultCloseOperation(WindowConstants.EXIT_ON_CLOSE)
     setLocationRelativeTo(null)
     setVisible(true)
   }
 )
}</lang>
Sidef
<lang ruby>require('GD')
func pinstripes(width = 1280, height = 720) {
   var im = %O<GD::Image>.new(width, height)
   var colors = [0, 255].variations_with_repetition(3)
   var paintcolors = colors.shuffle.map {|rgb|
       im.colorAllocate(rgb...)
   }
   var starty     = 0
   var barheight  = height//4
   for barwidth in (1..4) {
       for (
           var(startx = 0, colorindex = 0);
           startx + barwidth <= width;
           startx += barwidth
       ) {
           im.filledRectangle(startx, starty, startx+barwidth,
               starty + barheight - 1, paintcolors[colorindex++ % 8])
       }
       starty += barheight
   }
return im
}
File('pinstripes.png').write(pinstripes().png, :raw)</lang>
SmileBASIC
<lang smilebasic>FOR I=1 TO 4
COLIDX=0
YTOP=(I-1)*60
FOR X=0 TO 399 STEP I
 IF COLIDX MOD 8==0 THEN
  RESTORE @COLOURS
 ENDIF
 READ R,G,B
 GFILL X,YTOP,X+I,YTOP+59,RGB(R,G,B)
 INC COLIDX
NEXT
NEXT
@COLOURS DATA 0,0,0 DATA 255,0,0 DATA 0,255,0 DATA 0,0,255 DATA 255,0,255 DATA 0,255,255 DATA 255,255,0 DATA 255,255,255</lang>
Tcl
<lang tcl>package require Tcl 8.5 package require Tk 8.5
wm attributes . -fullscreen 1 pack [canvas .c -highlightthick 0] -fill both -expand 1 set colors {black red green blue magenta cyan yellow white}
set dy [expr {[winfo screenheight .c]/4}] set y 0 foreach dx {1 2 3 4} {
for {set x 0} {$x < [winfo screenwidth .c]} {incr x $dx} {
.c create rectangle $x $y [expr {$x+$dx}] [expr {$y+$dy}] \
-fill [lindex $colors 0] -outline {}
set colors [list {*}[lrange $colors 1 end] [lindex $colors 0]]
   }
   incr y $dy
}</lang>
Visual Basic .NET
<lang vbnet>Public Class Main
   Inherits System.Windows.Forms.Form
   Public Sub New()
       Me.FormBorderStyle = FormBorderStyle.None
       Me.WindowState = FormWindowState.Maximized
   End Sub
   Private Sub Main_Load(sender As Object, e As EventArgs) Handles Me.Load
       Dim Index As Integer
       Dim Colors() As Color = {Color.Black, Color.Red, Color.Green, Color.Magenta, Color.Cyan, Color.Yellow, Color.White}
       Dim Height = (Me.ClientSize.Height / 4) + 1
       For y = 1 To 4
           Dim Top = Me.ClientSize.Height / 4 * (y - 1)
           For x = 0 To Me.ClientSize.Width Step y
               If Index = 6 Then Index = 0 Else Index += 1
               Me.Controls.Add(New Panel With {.Top = Top, .Height = Height, .Left = x, .Width = y, .BackColor = Colors(Index)})
           Next
       Next
   End Sub
End Class</lang>
XPL0

<lang XPL0>code ChIn=7, Point=41, SetVid=45; int X, Y, W, C; [SetVid($13); \set 320x200 graphics mode in 256 colors for Y:= 0 to 200-1 do \for all the scan lines...
   [W:= Y/50 + 1;              \width of stripe = 1, 2, 3, 4
   C:= 0;                      \set color to black so first pixel becomes blue
   for X:= 0 to 320-1 do       \for all the pixels on a scan line...
       [if rem(X/W) = 0 then C:= C+1;  \cycle through all system colors
       Point(X, Y, C);         \set pixel at X,Y to color C
       ];
   ];
X:= ChIn(1); \wait for keystroke SetVid(3); \restore normal text mode display ]</lang>
- Programming Tasks
- Test card
- ActionScript
- Ada
- SDLAda
- AutoHotkey
- BBC BASIC
- Befunge
- C
- C++
- Common Lisp
- FreeBASIC
- Gambas
- Go
- Go Graphics
- Icon
- Unicon
- Icon Programming Library
- J
- Java
- Julia
- Kotlin
- M2000 Interpreter
- Maple
- Mathematica
- Wolfram Language
- OCaml
- Perl
- Phix
- Phix/pGUI
- PicoLisp
- PureBasic
- Python
- Racket
- Raku
- Ring
- Scala
- Sidef
- SmileBASIC
- Tcl
- Tk
- Visual Basic .NET
- XPL0
- AWK/Omit
- GUISS/Omit
- Lotus 123 Macro Scripting/Omit
- TPP/Omit
- ZX Spectrum Basic/Omit